Korean BBQ Tacos

IMG_2969

Chicago seems to be suggesting we’re headed toward warmer times (although those thunderstorms and annoying snow flurries certainly played games with Miss Fats).  And what that means for Miss Fats’ appetite is nothing but tasty ethnic food cravings.  Come sunshine, she can’t get enough Thai noodles, crunchy Vietnamese spring rolls, or spicy tacos.  Yet one particular flavor has been on Miss Fats’ mind (and taste buds) lately: Korean BBQ.  For some reason, nothing sounds better than that sweet salty sauce and spicy kimchee.

One of Miss Fats’ favorite food discoveries since moving to the Midwest are the Korean Tacos at Del Seoul (this genius trend had not yet reached Seattle. Confusing.)  Unfortunately those crazy delicious shrimp tacos are damn far from Hyde Park, so Miss Fats was determined to recreate some of their goodness at home.  After a bit of research and picking up only one ethnic ingredient (might be two for you!), Miss Fats has created her homage to the Korean taco.

IMG_2974

This meat marinade is so easy and works for any cut of meat that you just want to cook the shit out of.  So far, Miss Fats has tried this with a whole chicken (which she quartered) and a hunk of pork roast.  Both were crazy good.  The BBQ sauce is deadly: you just want to suck it up with a straw.  And you can easily just make the sauce and throw it on any left over meat you might have lying around.

Korean BBQ Tacos and Asian Slaw:
BBQ sauce reproduced from Steamy Kitchen’s Kogi BBQ Sauce

marinade:
meat of choice (1 whole chicken, 3 lbs of pork roast, etc)
3 tbs soy sauce
2 tbs sriracha
2 tbs sake (or you can use any rice wine or increase the rice vinegar to 3 tbs)
1 tbs rice vinegar
1 tsp sesame oil
4 cloves garlic peeled
1 inch ginger, peeled and sliced
water

bbq sauce:
2 tbs Korean fermented hot pepper paste (gochujang) (Miss Fats found this pretty easily at an Asian grocery store in Chinatown)
3 tbs sugar
2 tbs soy sauce
2 tsp rice vinegar
1 tsp sesame oil
1/8 tsp msg (totally optional.  Miss Fats has now tried it with or without: both times it was delicious.  The MSG just adds that little extra flavor that makes the sauce as addictive as those cold chow mein noodles sitting in your fridge.)

slaw:
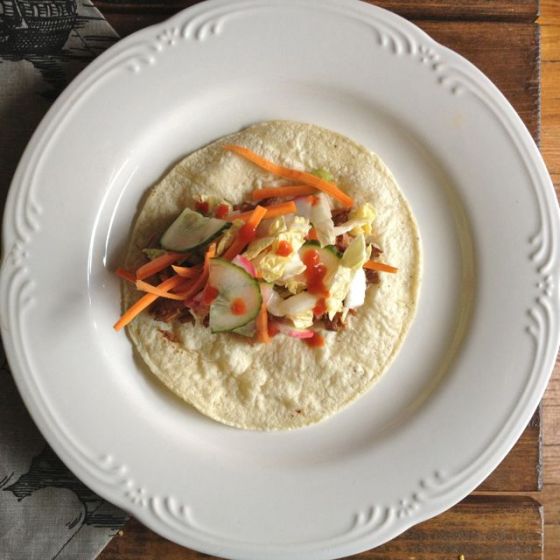
1/2 english cucumber, thinly sliced
4 large radishes, thinly sliced
1 carrot, julienned or shredded
1 cup shredded napa cabbage
1/4 cup sliced green onion
2 tbs rice vinegar
pinch of salt
sesame seeds (optional)

corn tortillas
sriracha (optional)
kimchee (optional)

1. night before: make the marinade.  In your slow cooker base (or another bowl if your cooker doesn’t disassemble), mix all the marinade ingredients together except for the water.  Throw your meat down and pour enough water to cover everything.  Refrigerate over night.

2. morning: cook everything for approximately 8 hours on low (or 4 hours on high) (this will really depend on your meat and how much you’re cooking), until the meat is falling apart.

3. make the slaw (this can easily be done ahead of time): toss all the ingredients into a bowl and mix.  The longer you refrigerate this, the more pickle-like it will become: yum yum.

4. make the sauce.  Mix together all the BBQ sauce ingredients in a bowl big enough to hold all your tasty cooked meat.  Remove your meat from the slow cooker and shred whatever animal you’ve prepared.  Toss in all that salty sweet goodness.

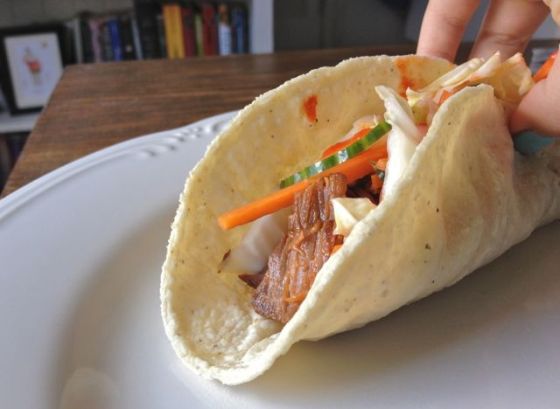
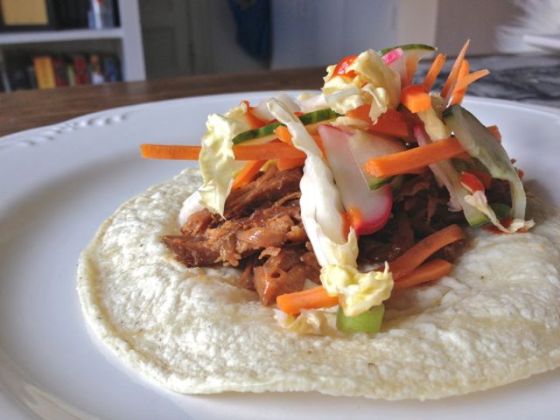
To assemble these guys Miss Fats throws down a steamed corn tortilla (just put ’em in the microwave for 1 minute with a wet paper towel underneath), a healthy portion of shredded meat, and a mound of crunchy slaw.  Then (of course) a drizzle of sriracha is needed with a side of spicy kimchee for “palate cleansing.”

IMG_2964

Miss Fats hopes you enjoy these weird ethnic monster tacos.  Too bad if you think a corn tortilla can’t be a vehicle for salty sweet asian bbq tasty times: you’re wrong.  But seriously: get out there and try these.  Guaranteed addition.
fungal fear: the tale of two yeast breads

IMG_2712Miss Fats apologizes for that title: she knows how it sounds.  But seriously: she’s got a fear of baking with yeast.  This is not some deep-seeded, repressed childhood problem: it’s completely irrational.  Yeast baking tends to take hours and hours of waiting and work, and can often go terribly wrong.  There’s nothing worse than spending all that time to create a disappointing product.  So it’s essentially been years since Miss Fats has tried baking with yeast, but about a week ago, she had the urge for a new project and one of those little packets ended up in her grocery basket.

She is always pinning recipes for cinnamon rolls and various breads that look insanely delicious, but Miss Fats has never bitten the bullet and just freakin’ tried to make them.  However, she stumbled upon this simple olive oil-based morning bun that seemed manageable: not to mention she had all the ingredients.

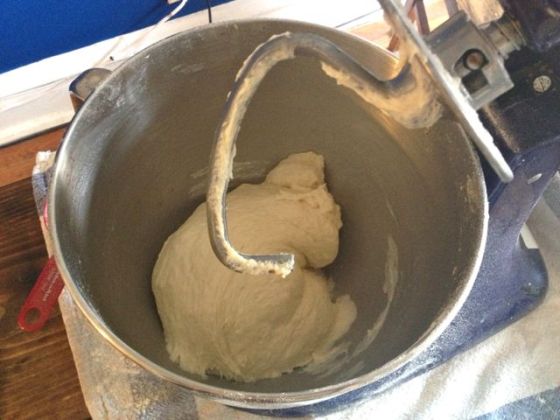
IMG_2718Recipe in hand, Miss Fats set aside a whole day to tackle these buns.  She began by trying to wake the yeast up with a little warm water and sugar: did not go well.  She followed the instructions: letting them sit in their warm little bath but she was not convinced they were alive.  Obviously Miss Fats obsessively googled what properly proofed yeast looked like while all this was going on: it did NOT look the same.  However she decided to press on with her pathetic looking bowl of spit-foam and just make the dough.  Naturally, her brain turned off and she accidentally ended up using a 1/3 cup measuring cup instead of the 1/2 cup she assumed she’d grabbed.  This created some problems as she was integrating the flour into the dough, which was looking real sticky… Unfortunately she didn’t realize her mistake until more than halfway through the process.  She half-heartedly added more flour and threw the dough in a bowl to rise, totally convinced it was going to be a brick.

However Miss Fats could not deal with a total bread failure.  So she decided to give it another try. She realized the morning bun recipe was in fact a focaccia bread base, so worst-comes-to-worst: she’d have buns and a loaf of bread.  Blaming her yeast (not her brain), she went out and purchased a new packet.  Again, the proofed yeast didn’t come out as planned and that bowl of rising dough was looking real flat.  Low point.  Using the correct measuring instrument, she followed the recipe again and hesitantly threw the dough into a bowl, placing it in the warmest part of her apartment.  Luckily this batch began to rise along with Miss Fats’ spirits.  (She just pretended first batch dough didn’t exist.)

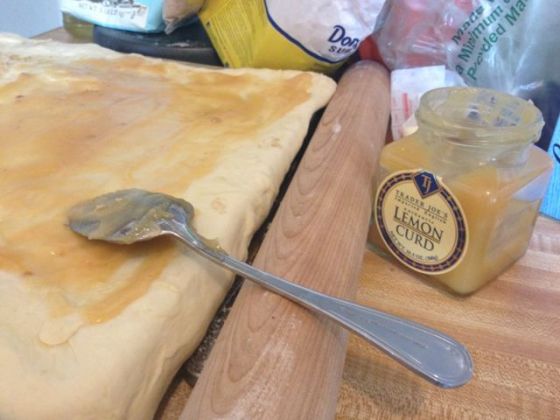
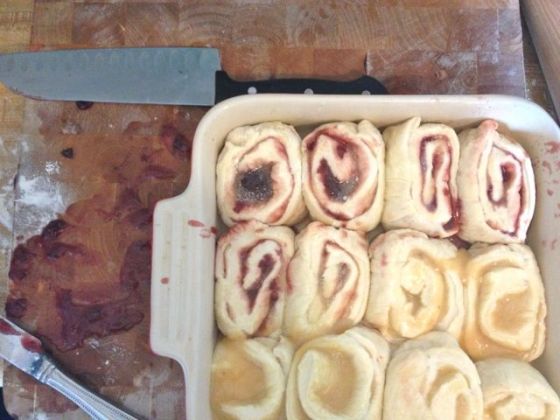
IMG_2743Miss Fats decided to alter the original recipe with some of the delightful preserves currently taking up space in her fridge.  She opted to fill these buns with butter, lemon curd and cherry preserves.  After rolling out her dough (with some effort: that shit is sticky), she spread melted butter all over it (because why not).  Next came the lemon curd and cherry, each spread over half of the rolled-out dough.  Doing her best to not make a mess, Miss Fats rolled up this gooey, jam-y mess and pinched the ends real tight.  She then cut that log up into twelve rolls, placing them into a 8×8 pan to rise again.  As you can see, this made a huge mess: oops.  Too much jam. Oh well.

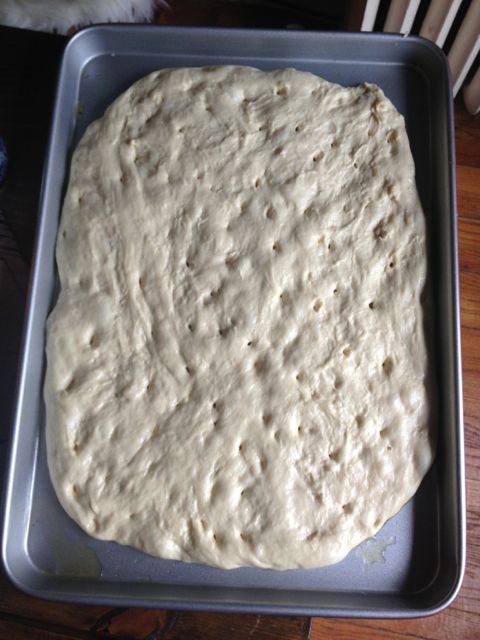
IMG_2751She let the rolls sit out to rise again (so much waiting!), and finally checked on that forgotten bowl of rising dough.  To her surprise (literally 3 hours later), it had actually doubled in size.  Having no real idea what to do, she stretched the dough out onto an oiled baking sheet and pressed little holes with her fingertips to create focaccia’s dimpled look.

IMG_2723more waiting.

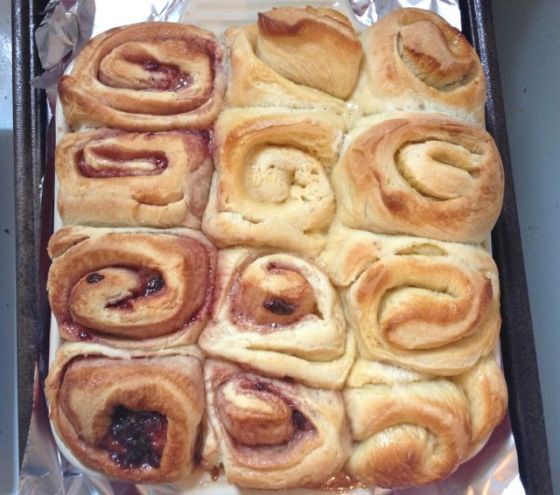
About an hour later, Miss Fats finally stuck the buns in the oven, fairly sure that they’d bubble over with jam and create a huge sticky mess of burnt sugar at the bottom of her oven.  These are the risks you take: she likes to live dangerously.

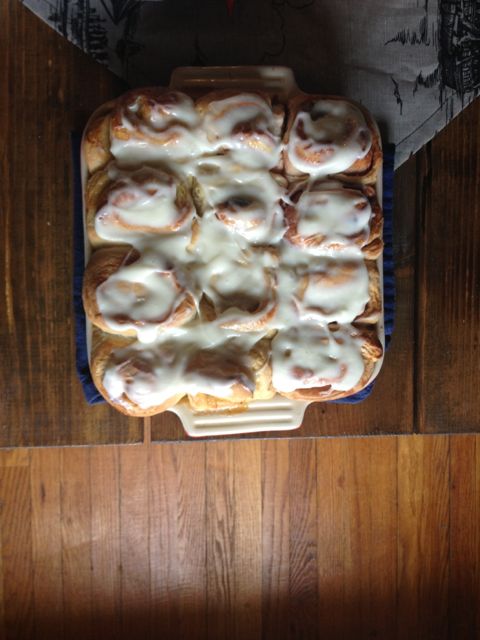
IMG_2774But they didn’t!  Somehow they turned out puffed, golden brown and oozing with fruity delight.  Clearly they looked at little naked, so Miss Fats decided to throw together a cream cheese glaze.  In a little bowl, she mixed about 4 oz of softened cream cheese, milk, lemon juice and powdered sugar until smooth.  Then obviously she slathered those hot buns in this tangy, sweet sauce.

IMG_2777Yep. Take it in.

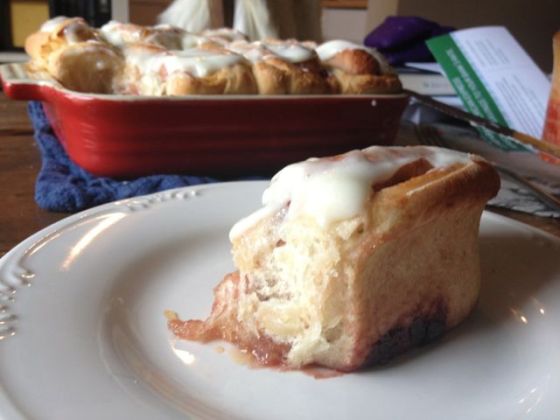
IMG_2791While they were still warm, Miss Fats dug into one of those sticky sweet buns which were surprisingly tender and chewy on the inside and crispy on the top.  The cherry preserves weren’t too sweet and went well with the cream cheese topping: think reconstructed danish.  She will say that these could have used more butter.  The subtle olive oil flavor of the dough was nice, but the excess of butter fat might always win on the baked good front.  Overall Miss Fats was incredibly pleased: she could not believe these little dudes actually came to life.

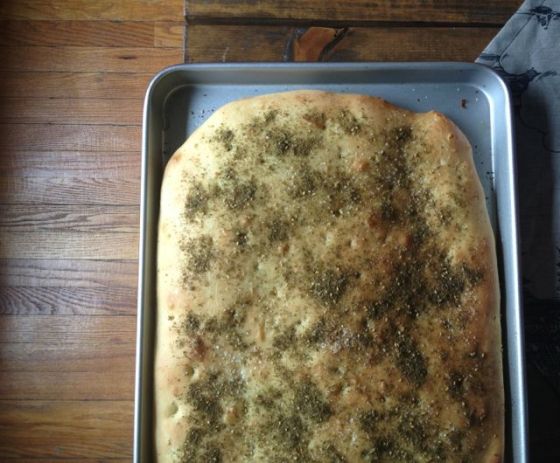
IMG_2761And back to the bread.  Feeling much more positive, Miss Fats finished off the focaccia loaf with a hearty dusting of kosher salt, some z’taar, and threw it in the oven to bake.  She was riding that hot bun high pretty hard, so even if this bread turned out as hard as a rock, she would have been elated with herself.

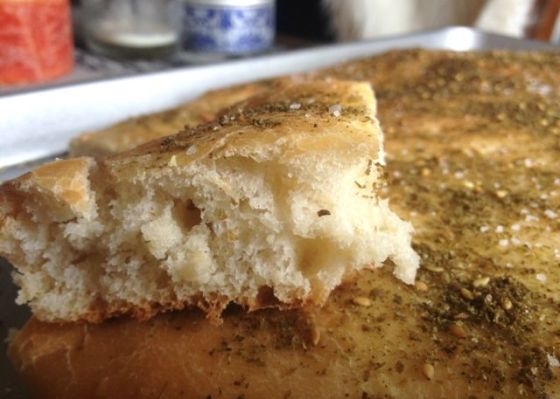
IMG_2764However it didn’t!  Instead Miss Fats got a fluffy, crunchy loaf of focacia bread!

Now how the hell to eat all this bready goodness? Called for a cheese plate.  Luckily Miss Fats’ a friend happy to oblige.  And Miss Fats and the breads lived happily ever after… then end.

Now Miss Fats probably won’t go baking bread every week, or even attempt a sticky bun for months, but she’s officially demystified the scary world of living yeast friends.  And bread week was awesome (she nom’d on that loaf for days), and just may have spurred a new special hobby to break out on those days when Miss Fats is stuck inside her lame apartment writing for hours on end.  Everyone deserves a fungus break after all.

Snickers Reece’s Monster Cake, or the most indulgent cake ever made

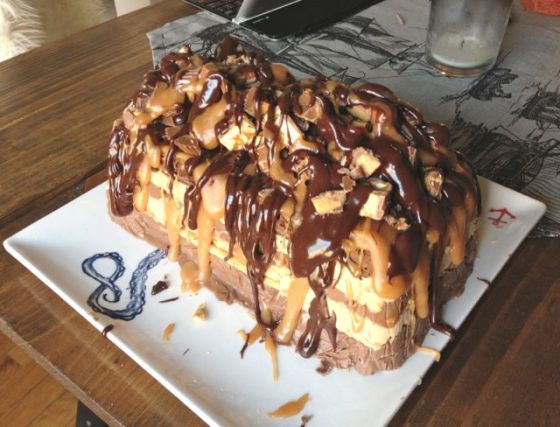
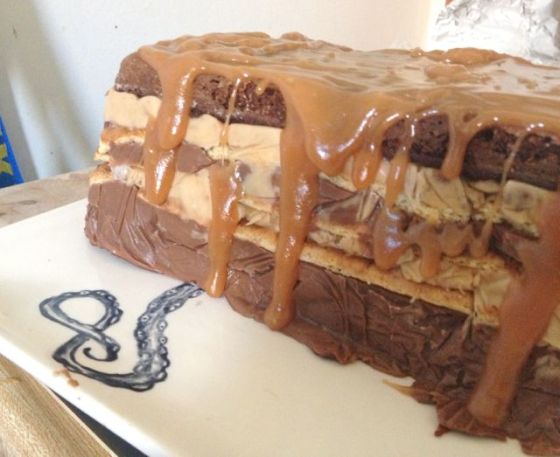
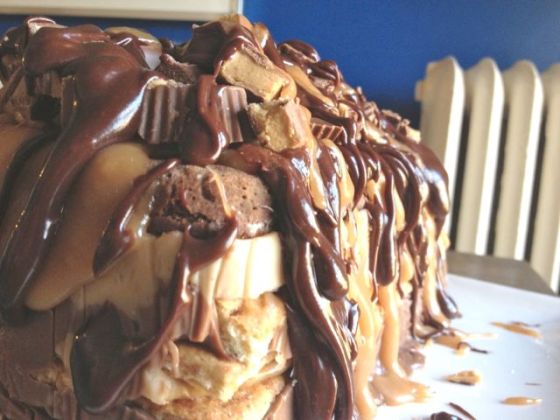
IMG_2557Just look at it. Pure cake monster.

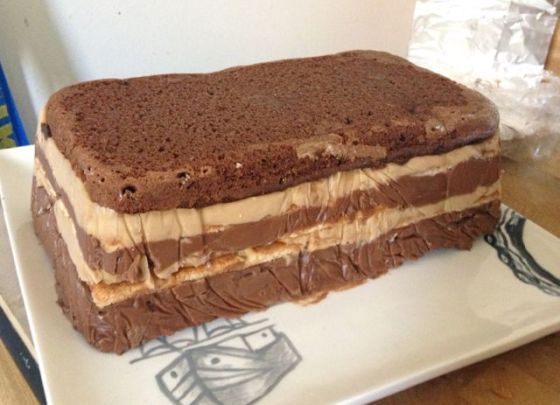
Miss Fats is a huge supporter of celebration: mostly because it involves cake.  So when her friend’s 30th birthday rolled around she was thrilled to be able to create a crazy cake for the big day.  This particular friend has the palate of a ten-year old boy: there’s no such thing as sugar excess.  This was Miss Fats’ chance to make the most indulgent cake of her life: she’d like to think she delivered.  He tends to favor Snickers and Reece’s candy bars, so Miss Fats just went for it to create a cake that layers dark chocolate cake, peanut butter and chocolate pudding, and graham crackers, all topped off with chopped candy bars, chocolate ganache and homemade salted caramel sauce.  Yep. Welcome to Snickers and Reece’s mutant child: Miss Fats named him Georg (pronounced “gee-org:” say it right.)

IMG_0339

This cake has a number of steps, but doesn’t actually take as much time as you think.  Not to mention the decorating process is endlessly fun and you cannot screw it up.  The key is getting all the components: you need to bake cakes, make pudding, ganache, and caramel sauce. Miss Fats split the process over two days to allow the cake to fully set up in the pan.  She recommends assembling the cake in the loaf pan on day one, and then finishing it off with the sauces and candy the next day.  What emerges from 48 hours of labor is a layered loaf of cakey-pudding crazy time that will send you right back to that Halloween when we discovered just how good it was to shove a mini Snickers and a Reece’s cup into your mouth.  Seriously, though, you are getting every texture with this cake: the fluffy cake, smooth pudding, and a good crunch from the graham crackers all topped off with big chunks of candy that have been drizzled in chocolate and caramel.

IMG_0347

There are a number of shortcuts one could easily take with this cake to speed up the process: using box cake mix, instant pudding, etc.  But Miss Fats doesn’t recommend this. Ever.  All of these recipes are incredibly easy and frankly won’t take you much longer than the processed, instant versions.  Not to mention a good basic chocolate cake and pudding recipe is key to have in your arsenal anyway.  Miss Fats also apologizes for the poor photo quality.  She has to admit that this cake was made in the middle of the night and unfortunately the pictures reveal the state of lighting and her mind at the time.

IMG_2547Snickers Reece’s Monster Cake AKA Georg:
makes one 9x5x3 loaf pan cake
adapted from Baker’s Royale Snickers Cake

cake:
Miss Fat’s favorite easy chocolate cake recipe can be found here.  She simply halved the recipe, and substituted prepared black coffee for the water.

pudding:
1/2 cup corn starch
1/3 cup sugar
heavy pinch of salt
4 cups whole milk
1/2 cup peanut butter (Miss Fats used unsalted chunky all natural)
1/2 cup semi sweet chocolate chips

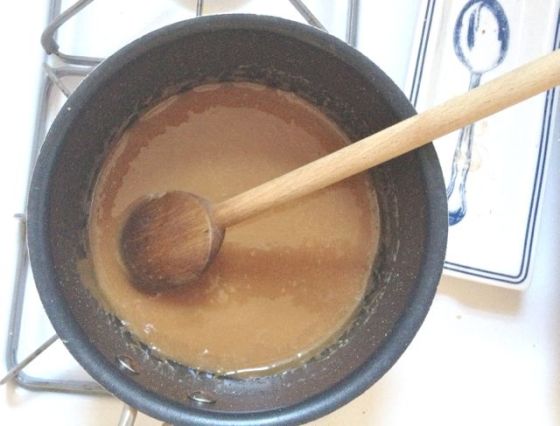
caramel sauce: Miss Fats used the recipe from Baker’s Royale and it was absolutely delicious.  All she added was a couple of good pinches of salt to give it that toffee, salty flavor.  ingredients and instructions are reproduced here.
1 cup sugar
6 tbs water
4 tbs butter
1/4 cup heavy cream

chocolate ganache:
4 oz semi sweet chocolate chips
1/4 cup heavy cream

2 snickers bars, chopped
3 packages of Reece’s (total of 6 regular sized cups), chopped
8 graham crackers (approximately)

1. Preheat oven to 350 degrees.  Make the cake: follow the instructions to make the batter in the link above.  Divide your batter between two greased 9×5 loaf pans and bake for approximately 15 minutes or until a toothpick comes out clean.  Allow cakes to cool for 10 minutes, remove from pan and allow to cool completely.

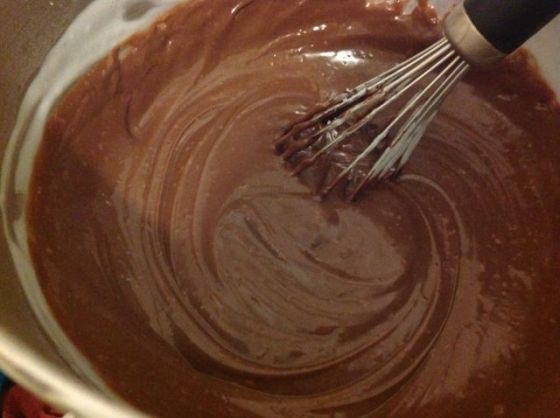
2. Make the pudding: in a large glass or metal bowl (that you can sit over a saucepan of water), combine the sugar, cornstarch, salt and milk.  Whisk vigorously to avoid any corn starch clumps.  Place over a simmering pan of water, whisking fairly frequently.  Allow the pudding to thicken until it coats the back of a spoon (Miss Fats’ took about 30 minutes).  Divide the pudding in half.  In one bowl, mix in the peanut butter.  In the other, stir the chocolate chips into the hot pudding.  Taste and add additional salt if you’d like.

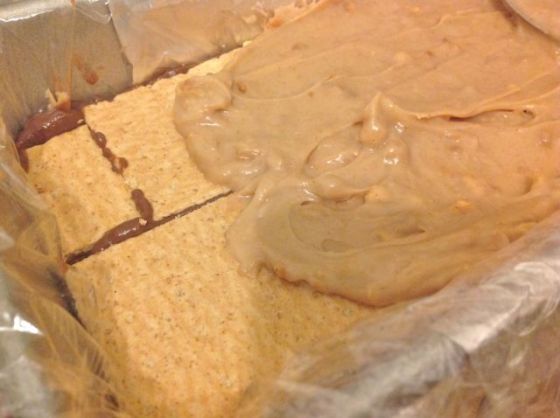
3. Assemble the cake: create a tin foil sling at the bottom of your 9×5 loaf pan by folding a long strip of foil in half and placing it across the width of the pan with sever inches hanging over the edge.  Line your pan with plastic wrap.  Place the first layer of cake at the bottom.  Follow up with a generous layer of peanut butter pudding (don’t skimp too much on this because the pudding helps keep the cake nice and moist).  Add a layer of graham crackers, followed by a thinner layer of chocolate pudding.  Repeat this step once more.  (You should have 2 layers of peanut butter pudding and 2 chocolate and 3 graham cracker.)  Top off with the second layer of cake.  This layer will be slightly smaller than the top of the loaf pan (if yours is tapered like Miss Fats’), so simply fill in the sides with chocolate pudding. Make sure you have an even top (if not, simple use additional pudding to do so).  Chill the cake overnight.  If your pudding was not super thick, Miss Fats recommends freezing the cake.

IMG_25454. Make the caramel sauce: place sugar and water into sauce pan over medium low heat. Stir and allow sugar to dissolve.  Once it has, turn up heat to high. No more stirring.  Simply swirl the pan as it begins to bubble.  Cook the sugar until it reaches a light golden brown (about 6-8 minutes): be careful not to take it too far.  Add the butter and cream and stir vigorously.  The mixture will bubble up so be careful.  Add a healthy pinch of salt. Remove from heat.

5. Make the ganache: heat the cream in the microwave.  Pour over chocolate chips, allow to stand for a about a minute and stir to combine.

6. Decorate the cake: to remove the cake from the pan, use the sling to make sure it’s loose (came out quite easily for Miss Fats).  Invert your serving platter (Miss Fats favors ones of the sea monster variety for this one) over the cake and flip.  Use the sling to make sure it comes out clean.  Remove the plastic wrap and foil.  Drizzle caramel sauce over top of the cake and mound half of the chopped candy bars on top.  Drizzle the ganache and more of the sauce.  Hell. just go to town with this.  No rules.  Drizzle and mound the hell out of it.

IMG_2551There you have it.  You’ve just birthed Georg.  Congrats on your mutant baby.  Miss Fats stored this monster in the fridge to allow all the sauce to set up.  She recommends allowing the cake to sit out for about 30 minutes before cutting and serving.

IMG_2555She hope you and your friends enjoy this pile of gooey, messy, chocolately goodness.  This cake is no joke and is NOT for amateur eaters.  Make sure to save Georg for only the best of your friends: