intensely coconut mini cake

IMG_3383

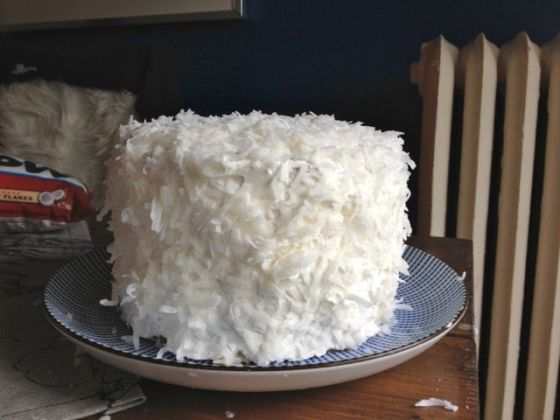
Last week was a big day for Miss Fats’ better half: J rang in her 30th year and a whole new decade of food adventures to be had.  Though she looks nowhere near her age, and is infinitely more exciting than any young person Miss Fats has ever encountered, J opted for a less rowdy, more intimate birthday celebration.  However just because J was being an adult, didn’t mean M needed to be.  Hence the craziest coconut cake ever.  This cake is a bit of a beast: not for casual or impatient baker.   However it really pays off in the end for those who love coconut more than life itself (which J does).

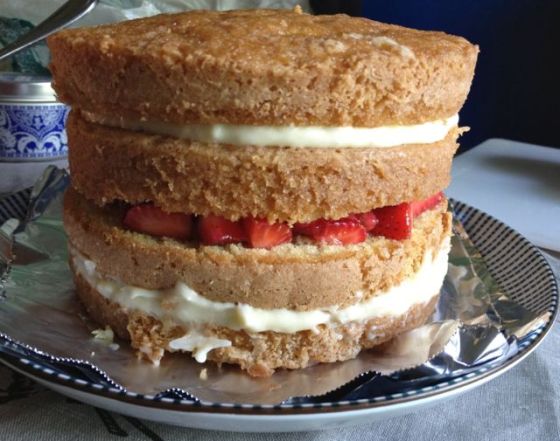
Since the gathering was a small group of six, Miss Fats opted for a minicake.  Now mini doesn’t mean less intense or less epic.  Instead she packed all the crazy times of a giant cake monstrosity into a nondescript mini version (she likes to think this intensifies the effect).  The cake features 4 moist layers of coconut cake with coconut pastry cream and strawberries.  The whole deal is then frosted with swiss buttercream and flaked coconut for good measure.  Lots of steps, but really worth it: both in looks and taste.

IMG_3372

The cake has been adapted from several recipes that have been altered and cut in half to make up for the mini form.  She assumes that any of these recipes below can be doubled for a large cake option.  Ultimately, you end up with a 6 inch stacked mini cake and a substantial bowl of extra coconut pastry filling (like you can’t figure out what to do with that).  Miss Fats went for strawberry filling to help balance the creamy coconuttiness, but any berry or tart option would do just fine.  Or if berries are out of season, just opt out. For this filling, Miss Fats created a half-cooked, half fresh filling so as to preserve the tart flavors of those fresh berries, while still holding it all together with some cooked jam-y fruit action. Miss Fats is going to take you through the steps carefully, but be warned that this cake is really more of a two-day process that requires periods of waiting and careful cake assembly work.  Plan ahead.

intensely coconut mini cake:
makes 1 4-layer 6 inch mini cake
cake adapted from What’s for Dinner?’s Truly Awesome Coconut Cake
coconut pastry cream adapted from
coconut swiss buttercream adapted from Willow Bird Baking’s Ultimate Moist, Fluffy Coconut Cake

cake:
1 stick unsalted butter, softened
1 cup sugar
3 eggs
1 1/4 cup flour
1/2 tsp baking soda
1/2 tsp salt
1/2 tsp coconut extract
1/2 cup unsweetened coconut milk

coconut pastry cream:
1 cup unsweetened coconut milk
1/4 cup sugar
1 tsp vanilla extract
good pinch of salt
1 1/2 egg yolks
1 tbs corn starch
1 tbs butter
1/4 cup whipping cream
1/2 cup flaked, sweetened coconut

strawberry filling:
1 pint of strawberries diced, divided
1/2 packet of unflavored gelatin
1 tbs sugar
1/4 cup water

coconut swiss buttercream:
1/2 cup sugar
2 egg whites at room temperature
1 1/2 sticks unsalted butter, softened
1 tsp vanilla extract
1 tsp coconut extract
good pinch of salt
1-2 cups of sweetened, flaked coconut

1. day 1, make the cake: Preheat oven to 350. Grease 2 six-inch cake pans.  Beat butter and sugar on high in a large bowl or stand mixer until pale and fluffy (about 3 minutes).  Add eggs one at a time, beating until combined after each.  Add coconut extract.  On low-speed, alternate adding the dry ingredients and coconut milk.  Increase speed to medium high and beat until combined (5-10 seconds).  Pour into pans and bake for approximately 15-20 minutes or until a cake tester comes out clean.  Allow to cool for at least 10 minutes before removing from pan.

2. day 1, step 1 of the pastry cream: in a sauce pan, over medium, heat the coconut milk, sugar, salt, vanilla and coconut extracts.  In a small bowl, mix the corn starch and egg yolks until well combined.  Once the cream is hot, temper the yolks by carefully adding 1/4 cup of the milk to the bowl, whisking constantly.  Add the yolk mixture back to the sauce pan, whisking constantly. Continue to mix over medium high heat for 3 minutes (for the FULL 3 minutes!).  Add the butter and coconut flake and mix.  Pour into a bowl and cover with plastic wrap (make sure you press the plastic wrap onto the surface of the cream to prevent skin-formation).  Store in fridge until cake assembly or until fully cooled.

3. day 2, step 2 of the pastry cream: beat whipping cream until soft peaks form.  Fold into the chilled cream and set aside until assembly.

4. day 2, strawberry filling: in a sauce pan, melt the sugar, and gelatin in water over medium heat.  Add half of the pint of chopped strawberries and cook for 5 minutes, mashing the berries with your spoon.  Transfer to a small bowl and mix in the remaining berries.  Chill in the fridge or freezer while you make the frosting.

5. day 2, swiss buttercream: In a stand mixer, whip egg whites until soft peaks form.  While the eggs are beating, heat water and sugar in small sauce pan over medium high heat.  Stir until the sugar has dissolved and then stop.  Bring the mixture to 240 degrees.  Reducing the mixer speed to medium, carefully stream the hot sugar mixture into the whites, avoiding pouring onto the whisk. Increase speed to medium high and beat until stiff peaks form.  Add the butter, one tablespoon at a time, beating until fully incorporated.  If buttercream appears curtled at any point, increase speed to high and beat until smooth.  Beat in extract until fluffy and smooth.

6. day 2, cake assembly: carefully cut each of your cake layers in half.  Lay down the first layer and pipe a ring of the buttercream around the edge of the cake to prevent the cream from oozing out.  Spread approximately 1/3 cup of the pastry cream onto the first layer.  Top with second layer.  Carefully spoon the strawberry filling on top, doing your best to create a thick, even layer.  Top with third layer.  Repeat the steps for a second layer of pastry cream.  Top with final layer.  Frost the outside of the cake with swiss buttercream (this doesn’t need to be pretty).  Using your hands, carefully pack the flaked coconut onto the sides and top of the cake.

IMG_3377

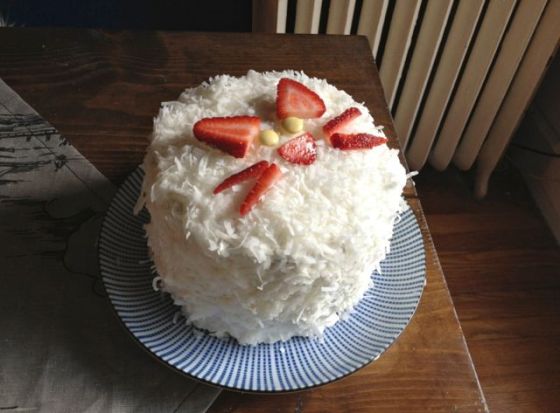
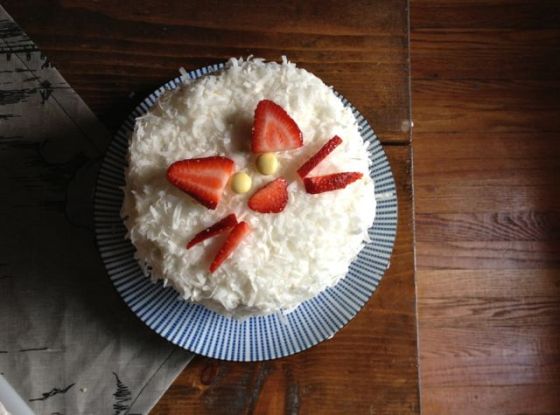
phew.  Miss Fats is exhausted.  However the cake is not complete just yet (or technically it is, but not up to Miss Fats’ standards).  Top off that insane cake with a cat face crafted of strawberries (see above).  Now you have the perfect coconut cat cake.

IMG_3381

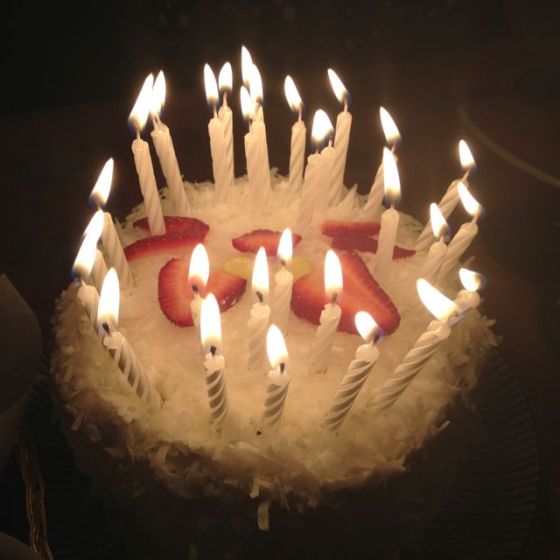
Miss Fats likes to think that this is truly a celebration cake.  All the hard work and multiple steps are worth it for that perfectly layered slice of cake on a special day.  Sure, modifications can easily be made to make this thing easier (omit the berry filling in favor of more cream, and whip up your favorite simple buttercream recipe instead of the crazy swiss version), but she likes to think that the amount of work involved in the cake directly correlates to how important and wonderful the person you’re making it for is.  So break this recipe out for your next coconut-obsessed bff, lover or cat.  Or just spend a fun day making this crazy cake for yourself and then please eat it while rubbing an overweight cat’s round belly (careful not to get fur into that slice).
IMG_3396

five minute blueberry scones

IMG_3495

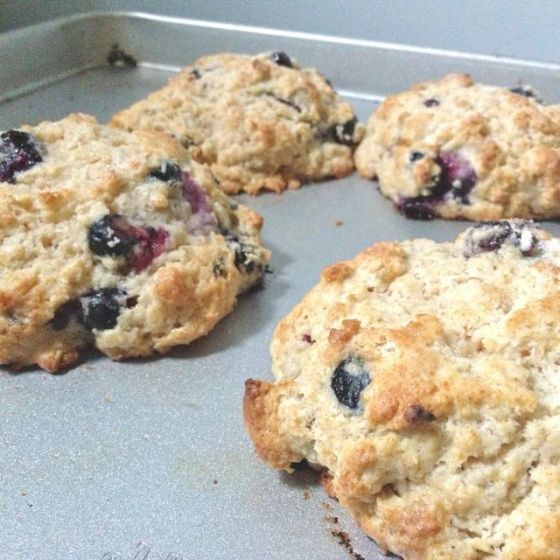
In honor of Miss Fats’ recent house guest, she’s crazy editing the crap out of her photos and sharing the easiest, most impressive 5 minute breakfast recipe.  Never mind the photo nonsense (it’s a dumb joke for her most design-y friend out there).  But definitely pay attention to this quick little scone recipe.  Miss Fats’ blueberry scones are no-fuss heaping piles of flakey pastry goodness.  These guys only require one bowl, five minutes, and can be easily adapted to any ingredients you have on hand.  Feel free to throw down other berries, nuts, chocolate, whatever.  It’s a mini recipe, so it serves up four appropriately massive weekend-coffee-drinking-scones.  No left overs.  Don’t even bother: just embrace your perfect portion of fresh baked goods.

Blueberry Scones:
4 large scones

1 cup flour
1 tbs brown sugar
1 tbs sugar
1/2 tbs baking powder
1/2 tsp salt
1/2 tsp cinnamon
1/8 tsp ground ginger
1/4 cup cold butter cut into pieces
1/2 cup heavy cream or milk
1/2 pint blueberries

1. Preheat oven to 425.  In a large bowl mix together flour, sugars, baking powder, salt and spices.  Using a pastry blender or two knives, cut the cold butter into the dry ingredients until you form large pea-size pieces.  Add milk and blueberries and stir until just combined (careful not to overwork the dough or mash the blueberries).

2. Spoon 4 heaps of dough on to a baking sheet and sprinkle with a little white sugar if desired.  Bake for approximately 10-12 minutes or until the tops are golden brown.

IMG_3480

Boom. Impressive weekend breakfast that takes minutes.  Miss Fats can tell you that these scones make quite the impression on those sleepy house guests.  You will essentially be Martha fucking Stewart if you serve these up warm with a cup of coffee in a house now filled with delightful pastry smells. The only bummer about this recipe is that they don’t keep super well.  Ok, they’re fine the next day. But let’s get real: there is nothing better than a warm, flakey, fresh-baked scone.  And Miss Fats likes to think that because the recipe is so small, you can handle just eating them all. Get over it.

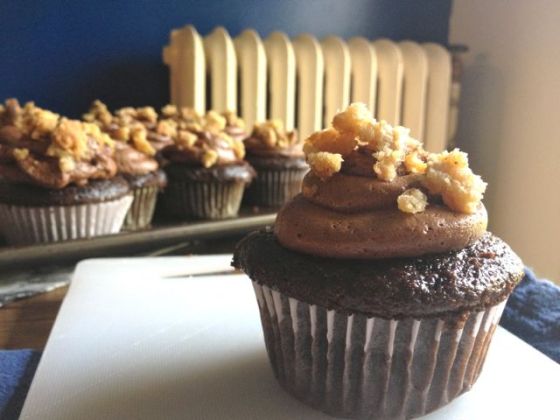
the miracle cure cupcake: cookie-dough-stuffed chocolate cupcakes with chocolate ganache frosting

IMG_3305

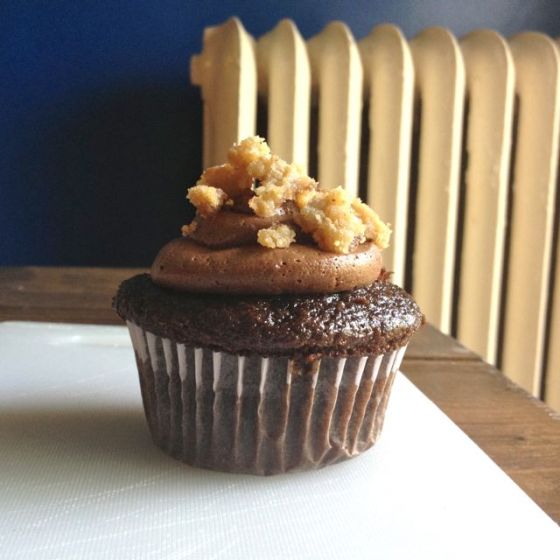
Are you ready to erase all ailments and stop the apocalypse? Miss Fats is sharing her latest “most-requested” cupcake with you all today.  This indulgent little dude is literally the cure to all bummers, because we all know that a cookie and cake will cure anything.  These cupcake have now undergone a series of names and Miss Fats seriously struggled to land on a final title for the recipe.  Anything from “break-up” to “PMS” to “crack” cupcakes, they’ve provided love and support for emotional ailments, and caloric fodder for rowdy celebrations.

Miss Fats locates their magical power in the balance between salt and sweet, moist cake and dough center, all topped off with fluffy ganache frosting.  She likes to think of these as a taste bud dance between childhood indulgences and thereby collapses space and time in a moment of pure mouth explosion.

IMG_3285

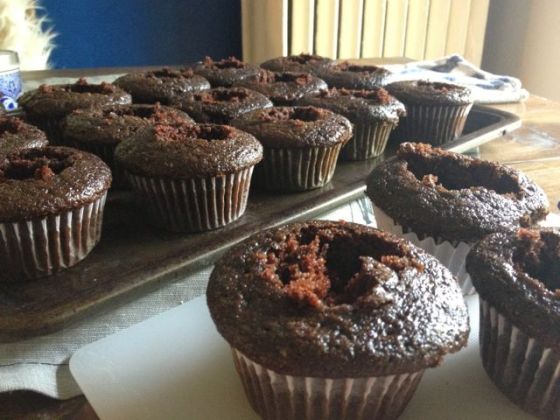
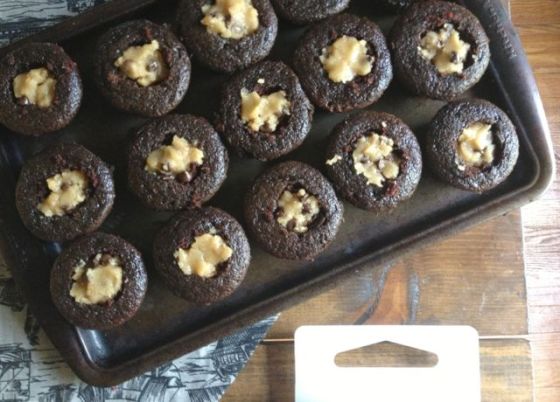
Now these may seem like they have a lot of steps, but they can literally be made in about 2 hours.  To make these happen, Miss Fats simply takes her go-to one-bowl chocolate cake recipe, hallows out some cupcakes and stuffs them with a eggless/levener-less dough.  As you can see above, the stuffing process is no fancy show: just hallow those suckers out and stuff some goodness in.  The frosting will cover it all up later. You’re also welcome to make these in steps: baking the cupcakes off and setting them aside, and then stuffing and frosting the next day.  Easy enough.  All three of the cupcakes components literally only require one bowl a piece, and can be done in minutes.  You see: this recipe is magical on just about every level.

IMG_3291

Miss Fats has also tried this out with a couple of different cookie centers.  As you all know by now, she’s a peanut butter addict, so naturally some of that action had to happen.  However she also recommends you try out ginger snaps for a cold fall day, or even add a little oatmeal raisin for a chewy center. But today Miss Fats is sticking to the classic: a salty-sweet chocolate chip cookie, and a moist dark chocolate cake.

IMG_3304

Miracle Cure Cupcakes:
makes 24 cupcakes
cake transcribed from The Kitchn’s Dark Chocolate Cake

cake:
2 cups sugar
1 3/4 cup flour
3/4 cup cocoa powder
1 1/2 tsp baking powder
1 1/2 tsp baking soda
1 tsp salt
2 eggs
1 cup milk
1/2 cup oil
1 cup boiling water

filling:
1 stick melted butter
1/2 cup sugar
1/2 cup brown sugar
1/3 cup flour
1  1/2 tsp salt (sounds like a lot, but it balances the cake and frosting)
1/2 cup chocolate chips

frosting:
2 cups chocolate chips
2 cups heavy cream
heavy pinch of salt

cookie crumbles or pretzels for decoration/that tasty bite on top

1. Heat the heavy cream in the microwave for approximately 2 minutes or until super hot.  Dump the chocolate chips into your stand mixer bowl (or another large bowl) and pour hot cream over top.  Whisk until the chocolate has melted and you’ve formed an insanely good-looking ganache.  Allow to cool completely to room temperature (or stick it in the fridge if you’re impatient).

2. Preheat oven to 350 degrees.  Line cupcake pans. In a large bowl, whisk flour, sugar, cocoa powder, baking powder, soda, and salt.  Make a well in the center and add eggs, milk and oil.  Whisk until well combined (about 2 minutes).  Add boiling water, mix until combined.  Pour batter into cupcake pans, filling approximately 3/4 of the way (do not over-fill these!)

2. Bake for 18-20 minutes.  Once cool enough to handle, use a small spoon to scoop out the cupcake centers, discarding (or snacking on) the extra cake.

3. In a small bowl, combine all the filling ingredients.  Use your small spoon (or fingers) to add about a tbs of the mixture to each cupcake.

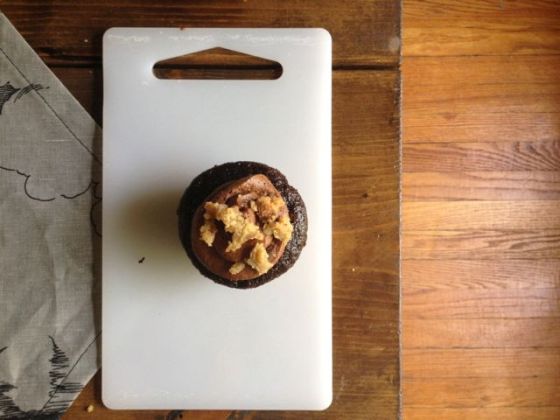
4. Once the ganche has cooled, whip on high speed using an electric mixture until stiff peaks form.  Cover up those gaping holes with frosting: you can do this rustic-style with a knife, or simply spoon the fluffy frosting into a ziplock bag, cut off the tip, and swirl it over top.  Top off with a little crumbled cookie or pretzel for good measure.

IMG_3296

Not so hard huh?  The hard part is actually restraining yourself from eating all of them.  Good luck.

Miss Fats favorite comment on these cupcakes comes from a recent night of birthday shenanigans.  Well into an evening of drunken karaoke, the birthday boy leans over to Miss Fats and tells her, “These cupcakes are the greatest thing in the history of the universe.  I’m afraid if we eat them all we’ll cease to exist.”  Now this may be a bit of a hyperbolic statement brought out through copious amounts of alcohol, however he’s clearly zeroed in on a critical issue: living in a world without cupcakes just isn’t worth it. Plus why risk the end of the universe? Make these cupcakes: save mankind.

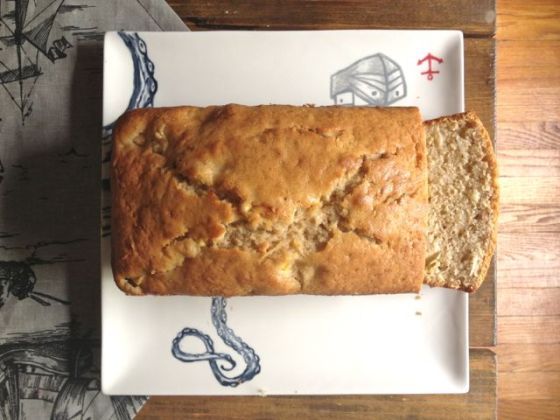
Mango Coconut Bread

IMG_3174

Summer, is that you I see approaching? With Chicago’s temperatures pushing 80 this week, Miss Fats was feeling a little tropical.  The warm (maybe even a little too warm. uh oh.) weather spurred nothing but good attitude and required an equally cheerful flavor combination for this weeks’ breakfast treat. Naturally, however, by the time Miss Fats got around to making the loaf, Chicago’s weather decided to return to confusing grey and weird patches of wind and rain.  Whatever, Chicago.  Like that’s going to stop Miss Fats.

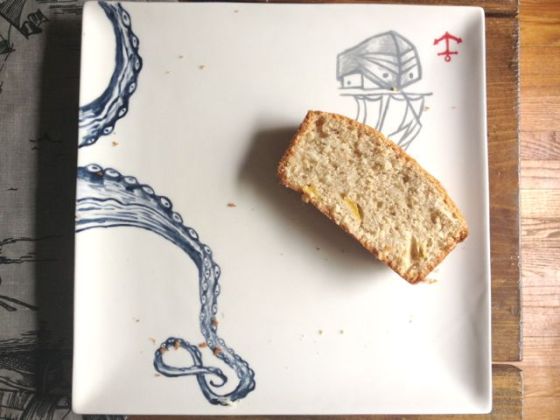
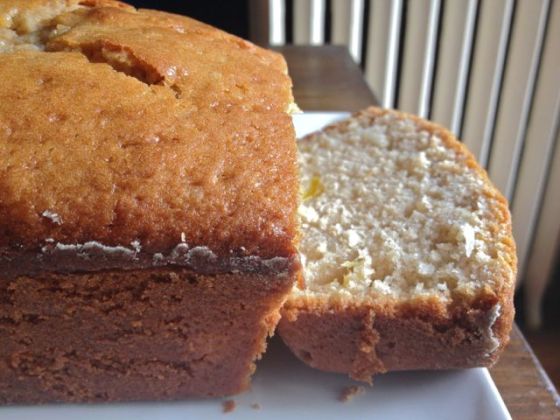
In order to transport this basic breakfast loaf, Miss Fats turned to mango and coconut.  Typically she’s not into the sweet flavors of the tropics, but this cake brings the perfect amount of sun. She began with Smitten Kitchen’s Coconut Bread recipe as a base, but decided to really amp up the coconut flavor by switching out butter for coconut oil and milk for coconut milk.  Lastly, she added chunks of fresh, ripe mango to the batter which dotted the bread with tasty soft bites of the sweet fruit.  Since mango is in season, Miss Fats went for fresh, but she’s sure that big chunks of dried mango would be equally delicious.

IMG_3181

The cake turned out super moist: almost layer cake consistency.  And despite the juicy mango fruitiness throughout, the loaf itself wasn’t too sweet and can definitely still mask as a breakfast bread.  And naturally, since Miss Fats is lazy, she changed the original recipe to a one bowl deal.  Basically you just throw all that goodness into a bowl and mix. Done. Tropics in no time.

Mango Coconut Bread:
adapted from Smitten Kitchen’s Coconut Bread
makes 1 loaf

2 1/2 cups flour
1 cup scant sugar (depending on how ripe your mango is)
2 tsp baking powder
1 tsp cinnamon
1/2 tsp ground ginger
1 tsp salt
2 eggs
1 cup coconut milk
6 tbs melted coconut oil
3/4 cup flaked, sweetened coconut
1 mango, diced

1. Preheat oven to 350 degrees.  Grease a 9×5 loaf pan.  In a large bowl, combine flour, sugar, baking powder, salt, cinnamon and ginger.  Make a well in the center, crack in eggs and add the coconut milk.  Stir until just combined.  Mix in coconut oil and stir until smooth.  Fold in coconut and mango.

2. Pour into loaf pan and bake for 60-70 minutes, or until a tester comes out clean.

IMG_3175See: that easy. You are literally about an hour away from mini tropical cake vacation.  Miss Fats highly recommends starting your day with a big slice of this loaf, cup of coffee and some fresh sliced pineapple.  Then, all ones needs to do is imagine some palm trees and an island breeze and you’re basically there. Ok fine. You’re not even close.  But you might be closer to booking that plane ticket and in the very least, full of delicious cake.

Recipe Review: Salted Caramel Date Loaf

IMG_2961

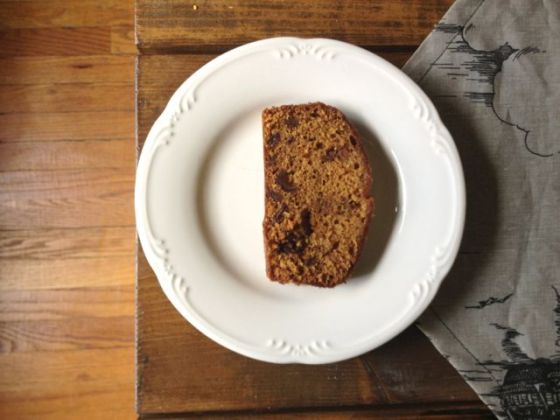
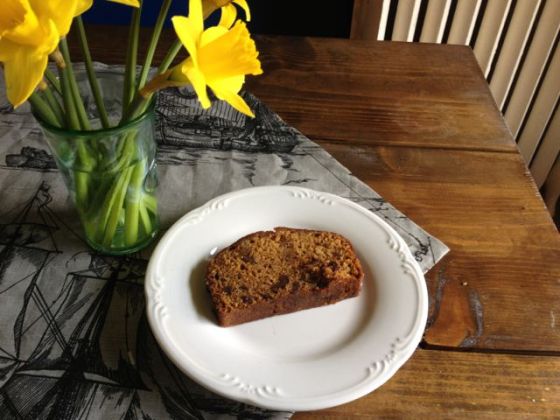
Again with these loaves.  Miss Fats has been baking up a number of quick breads lately and hasn’t been documenting them for you because they tend to fail pretty miserably in photo form.  Despite the fact that they are often filled with tasty moist wonder, loaf cakes more often appear to be boring brown logs on camera.  Case and point above: hey brown square, you look real lame and why would anyone want to eat you?  Oh yeah that’s because you’re the perfect balance of sugar and salt and soaked in an insanely good caramel sauce.  Who says the camera reveals?

But Miss Fats couldn’t help but review her new favorite loaf cake recipe from Not Without Salt (her new favorite blog name: they get her.)  The Salted Caramel Date Loaf was a spontaneous recipe she tried out one night when a sudden bout of stress baking hit her hard.  She had about an hour to make some baking happen before a friend arrived for dinner.  This recipe was ideal: simple, 1 pot, 1 pan and very little work.

IMG_2958

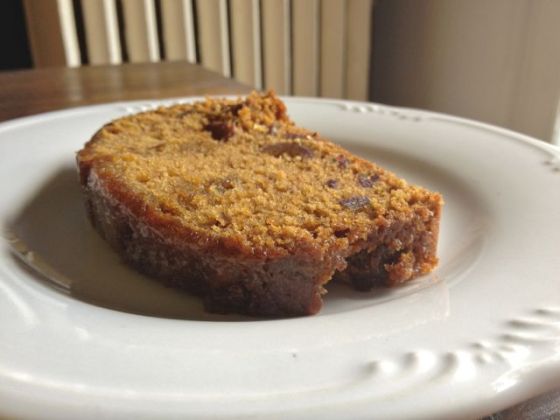
This recipe takes the basic dump loaf cake to a new level by simply caramelizing the sugar in the cake batter.  Miss Fats has very recently gotten over her fear of caramel and all forms candy cooking, so she was ready to face this head on.  And for those of you who might still be skeptical about sugar-cooking skills, this cake is the ideal way to begin your steps toward recovery.  Whenever you read a recipe with sugar caramelization there’s always warnings about sugar crystals and temperatures etc.  But none of that really matters here: all you’re really doing is getting that smokey burnt sugar flavor.  The cake’s texture will be handled by all that butter and date action.

So the real magic of this cake comes from the caramel glaze.  And now you’re probably saying: what? I have to face my caramel fears twice to make this cake happen?  It be worth it.  Miss Fats should clarify: this glaze does not approach the difficulties of a well executed caramel sauce.  Instead, Not Without Salt has brilliantly used brown sugar and butter to counter any of the problems involved with white sugar crystallization nonsense.  Instead the glaze just goes for the full on fat of heavy cream and butter getting all warm and tasty with brown sugar’s molasses.  Miss Fats added a little extra salt to the glaze to enhance that sweet-salty flavor combo (she wanted to make sure some of that action got down into the loaf).  Then you get to dump all that gooey glaze over top the hot cake and watch it sink in while you fantasize about just how good that pocket of caramel will be when you stick it in your mouth.  And it’s topped with salt.  What’s better?  Probably nothing.

IMG_2955

Miss Fats has now made this loaf a couple of times and its proven to be the perfect weeknight dessert, indulgent breakfast, or giftable treat.  The second time she made the cake, Miss Fats added a bit of ground ginger to the batter to play up the dates.  She’s sure this cake could be taken in a number of festive directions depending upon the time of year (family, welcome to your Christmas present).  Miss Fats will deem this one the brown square of mystery. Despite its lame appearances, there lurks a salty-sweet moment in its (lamely) photographed portrait.  Now go out and discover it.

Orange and Dark Chocolate Bundt Cake

IMG_0387

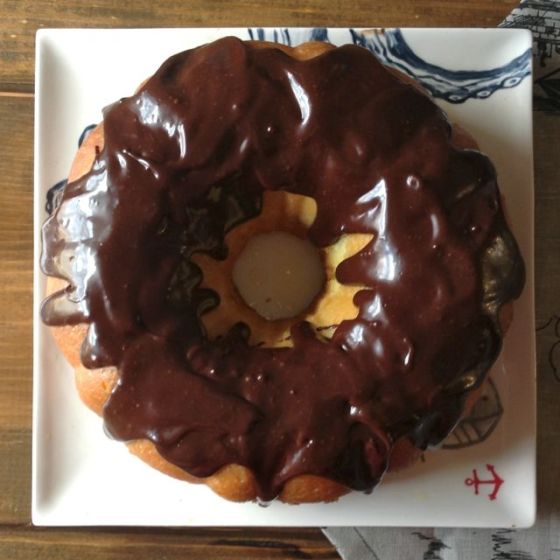
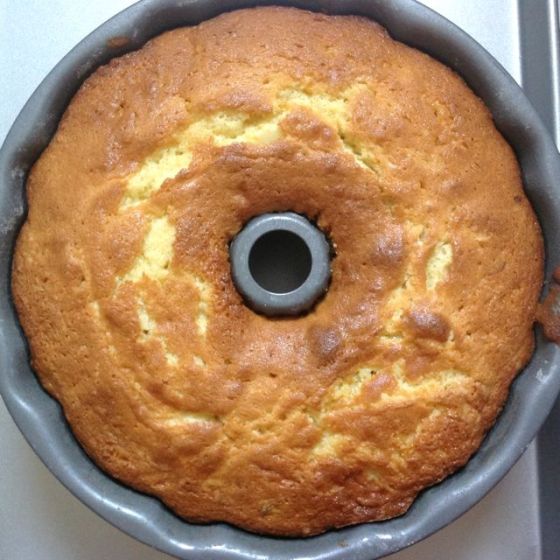
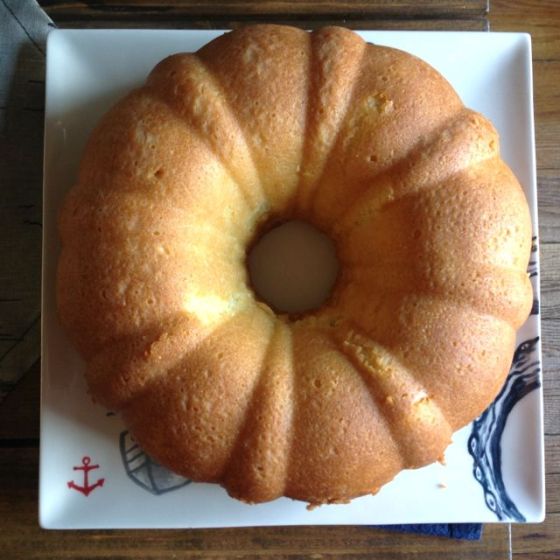
Miss Fats almost always forgets about the bundt cake as a baked good option.  The round and slippery pan has just become that awkward globe-like thing that keeps falling on her head when she’s reaching for the cupcake trays.  She’s not sure why, because frankly that pan’s fancy shape sure makes for an impressive cake with very little decorative action.  Not to mention the bundt cake almost always encourages just dumping whatever tasty frosting option all over and watching it ooze down the sides.  Mmm oozy food porn.

So when Miss Fats had to bake a cake for a late morning celebration, she dusted off her bundt pan and make the perfect treat to transition from am to pm sweets.

IMG_0378

This recipe makes a not-too-sweet cake with a crumb similar to a muffin, but still forkable enough to call it dessert.  The orange flavor is subtle, so for all you citrus fiends out there, Miss Fats encourages you to turn it up a notch with more zest and orange extract (and then let Miss Fats know how it goes!)  She glazed this cake with a simple orange syrup to keep it nice and moist and get more of that orange flavor in there, and then topped it all off with a serious dump of bitter-sweet chocolate.

Orange and Dark Chocolate Bundt Cake:
adapted from Lemon-Buttermilk Bundt Cake from Bon Appetit
serves 8-10

1 cup unsalted butter at room temperature
3 cups flour
1 tbs baking powder
2 tsp salt
2 cups sugar
4 eggs
1 cup milk
2 navel oranges zested, with just the flesh removed and chopped, and the remaining squeezed for juice (yep. use that whole orange)
1 lemon zested and juiced

1 navel orange zested and juiced
2 tbs powdered sugar

8 oz dark chocolate

1. Preheat oven to 350 degrees.  Grease (butter and flour) a 10 inch bundt pan.  In a separate bowl, combine flour, baking powder and salt. In a large measuring cup, combine the milk, citrus juices and zest.

2. With an electric or stand mixer, beat the butter and sugar on high speed until light and fluffy (about 4 minutes).  Add the eggs, beating until well combined after each.

3. Alternating between the dry ingredient mixture and the liquids, add them in about three stages to the fluffy stand mixer mixture.  Make sure to scrape down the sides as you go.  Mix in the orange pieces.  Pour into bundt pan and bake for approximately 50-60 minutes or until a cake tester comes out clean.  Let cool for 10 minutes and invert onto cooling rack.

4. In a small bowl combine the orange juice, zest and powdered sugar. Once the cake has mostly cooled, glaze the cake with a pastry brush, making sure it soaks up all that extra orange juice goodness. Allow the cake to fully cool.

5. Using a double broiler (or some careful microwave action), melt the dark chocolate.  Carefully and slowly dump the dark chocolate over top the cake, making sure it’s evenly distributed.  Miss Fats recommends doing this in stages, watching (and perhaps aiding) the chocolate as it drips down the sides.

IMG_0381

There you have it: probably Miss Fat’s most reserved cake.  However she respects this one: there’s an elegance to the solid orange/chocolate combo that we often forget.  She also apologizes for the lack of proper food porn documentation.  She clearly got distracted by dripping dark chocolate and frankly isn’t all that sorry about it.

Obachan’s Sukiyaki

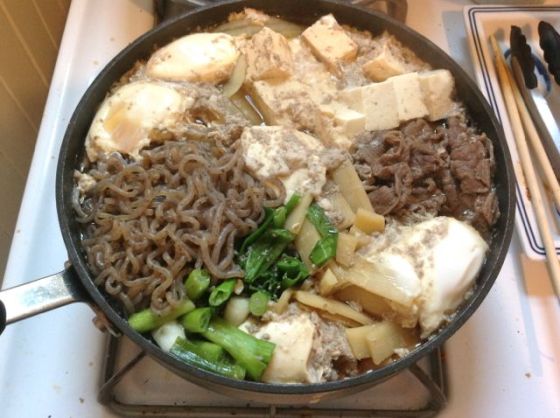
IMG_0454Now this is a treat, people.  Miss Fats is sharing a serious secret with you today.  She’s going to give you the run down on Obachan’s famous sukiyaki.  This is easily Miss Fats’ most requested meal by her oldest friends who have had the delight of sitting down with Obachan over a steaming, giant pan of her magical sukiyaki.  They’ll testify to the pleasure party of this dining experience.

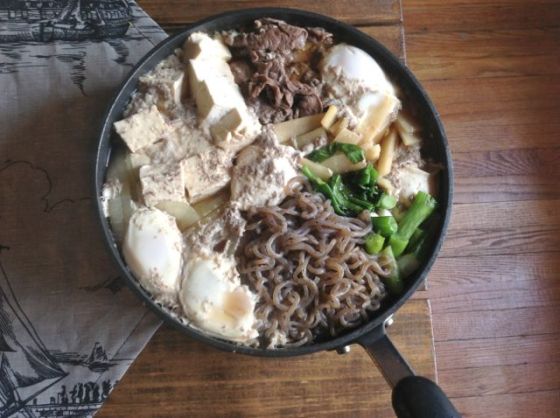
For those of you who might not be familiar with sukiyaki, it’s a communal pot of goodness featuring an array of ingredients cooked in a salty sweet broth and consumed with japanese sticky rice.  Though the picture above may look like shitty food porn, it’s actually a tasty combination of items from which you can pick and choose (but lets get real: you just grab some of everything).  The communal pot (how Obachan always serves it up), allows people to choose anything from meat to vegis and makes this dish infinitely adaptable to whatever you have on hand.  The key is really the cooking process and the broth itself.  This no fuss family style meal is also perfect for a little dinner party or larger groups of people (permitting you have a big enough pan.  You should see Obachan’s: it’s bigger than her. No seriously.)

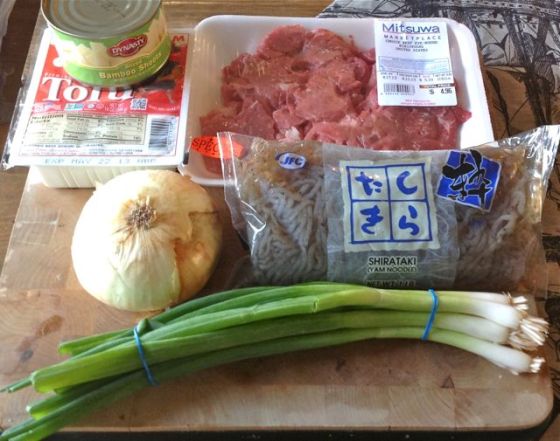
IMG_0434Miss Fats will say that this dish requires a bit of hunting for ingredients.  However that’s really only if you want to stick with the recipe exactly.  The sukiyaki meat in particular can prove challenging.  This super thin sliced beef is the perfect tender cut for the quick cooking and communal pot.  She recommends aiming for a cut of beef that resembles  Philly Cheese Steak meat. The other challenge is the shiraki, or japanese yam noodles.  However thanks to the low carb fad, many grocery stores actually carry them in the guise of some bullshit “magic” noodle name.  These can typically be found near the tofu at gourmet grocery stores (they will be vastly marked up, so if you do have an Asian grocery store nearby, Miss Fats recommends heading there first).

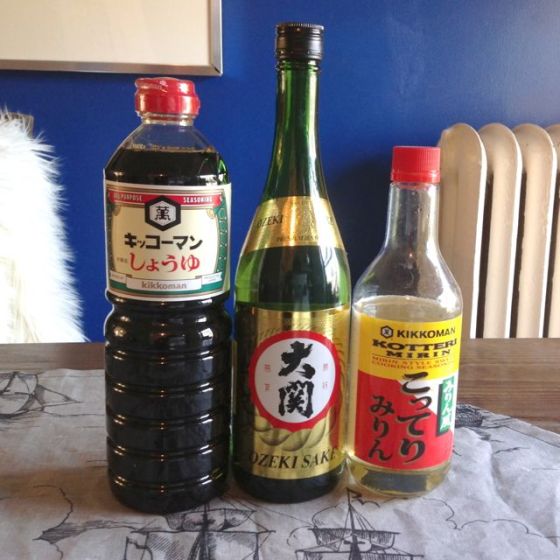
IMG_0422The yummy broth base may require some hunting, but once you have them on hand, you can make this dish whenever you want.  The trickiest item would be the mirin, a sweet japanese cooking wine that is key.  Miss Fats has seen this at many grocery stores in the Asian foods aisle, but again, it will be overpriced.  She highly recommends a trip to the Asian Grocery store to pick up the shiraki, meat, mirin, and sake.  Over-buy and hoard.  The meat freezes well.

IMG_0436So Miss Fats is going to give you the run down on this process featuring the standard ingredients to be found in Obachan’s pot.  However she also highly recommends the addition of cabbage, green beans, broccoli and water chestnuts (not all at once unless you have some sort of crazy monster pot).  In order to make this happen you need a pot at least 3-4 inches deep that had a lid and the wider the better.  Miss Fats has never tried this in a stock pot, but she doesn’t see why it wouldn’t work.  Lastly, feel free to alter the amounts of any of these ingredients: if you dig on those noodles, fill half your pan (Miss Fats’ fantasy sukiyaki).  For you meat lovers out there, you can also cook as much meat as you want, and simple reserve the excess in the bowl that you keep off to the side. (Obachan always does this for the boys.)

Obachan’s Sukiyaki:
6-8 servings
serve with white rice

1 1/2 lbs of sukiyaki beef, or thin cut
1 onion, thick sliced
1 8 oz package of shiraki noodles (or yam noodles)
1/2 package of tofu, cut into 1 inch cubes
1 bunch or 5-6 green onions, roughly chopped including most of the green
1 small can of bamboo shoots
4-5 eggs (or however many people you have)
1/4 cup soy sauce
1/4 cup cooking sake
2-3 tbs mirin (to taste)
3 tbs sugar (to taste)
water
1 tbs or so of oil

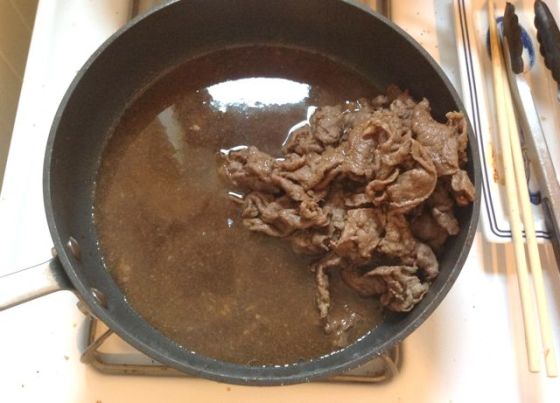
IMG_04391. Heat oil in pan over medium high heat.  Add the beef, breaking it up and cooking until just brown (this should only take a couple of minutes.  Reduce the head to medium low, add the soy sauce, sake, sugar and mirin.  Stir and taste the broth.  Add more of any of the ingredients to taste.  You are aiming for a nice balance between sweet and savory.  The broth should be really concentrated at this point: do not worry.  The water added at the end will dilute it.

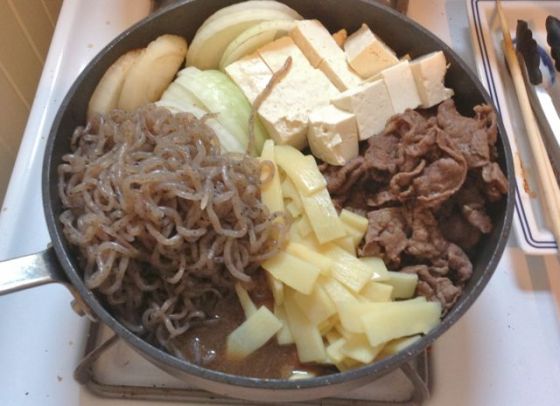
2. Section off the beat into a pie-piece like mound (see above).  Following this arrangement, add the onions, tofu, shiraki, and bamboo shoots, doing your best to keep them relatively contained to individual sections.  Leave a little space for the green onions (or any other quicker-cooking vegis you want to add).  Pour enough water into the pot so it almost covers all the ingredients.  Cover, turn the heat up to high, and cook for about 8-10 minutes. Keep an eye on it.

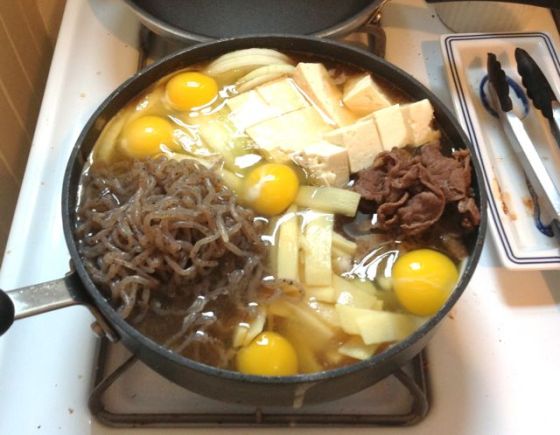
3. Once you see the onions start to turn translucent, add the green onions and eggs.  For the eggs, use chopsticks or any cooking utensil, to create little pockets and break them into the space.  Cover and cook until your eggs are to your liking and the onions are soft.

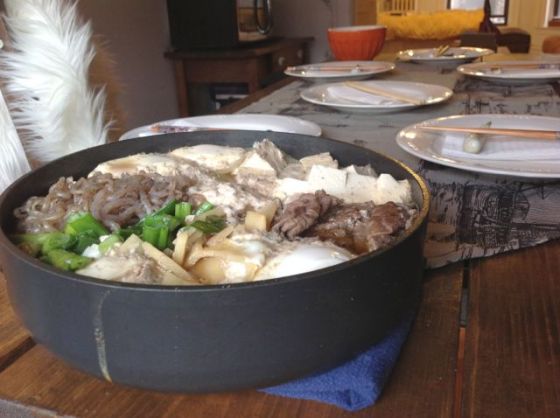
IMG_0449See: not so hard.  To serve this up, Miss Fats recommends just throwing down a hot pad onto the table and plunk this sucker down.  (Obachan’s is so large and heavy, she always requires help with the carry to the table.)  All you need to do is lay down a little white rice and go to town on this thing.  Make sure you’ve got a big ‘ol spoon to scoop up broth too.

IMG_0450

This meal comes with a warning, however.  No matter how hard you try, this dish will never be as good as Obachan’s.  Believe her: Miss Fats has been expertly taught how to execute this dish by the master herself and still cannot manage to create the perfect pot of sukiyaki.  But for those of you who haven’t or never will have the pleasure of dining with the master herself, Miss Fats warns you that this dish will make you pretty popular among your friends.  This messy pot of japanese food love can easily become a staple of friendertaining/ annoying cooking requests.

Miss Fats encourages you all to get out and try to create this delightful dish.  It encourages new flavors and communal eating, which Miss Fats is a huge supporter of.  For years, Miss Fats’ family gathered at Obachan’s every single Wednesday to chow down on sukiyaki good times.  She hopes you will continue this tradition with friends and bring a little Obachan into your eating experiences.

IMG_0462

Recipe Review: Chai and Salted Pistachio Morning Cake

IMG_2872

So Miss Fats has clearly done a terrible job at blogging lately.  She has been seriously MIA for about a month.  But May brings a resolve to return to actually writing about her food, not just consuming it.  Forcing this work wake up call upon herself, Miss Fats has decided to start with a tasty breakfast cake for all you wake and “bake” folks out there.

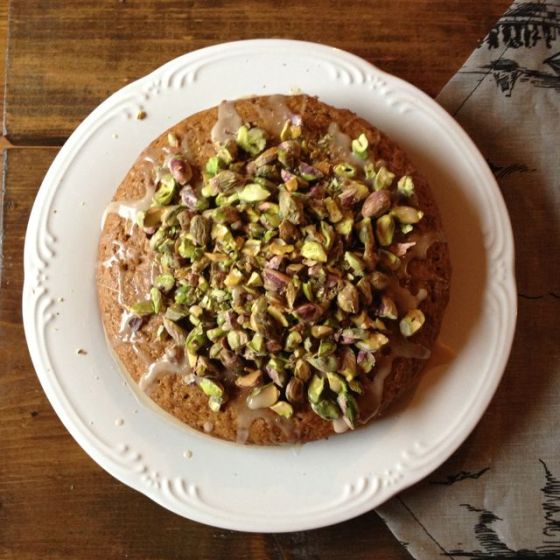
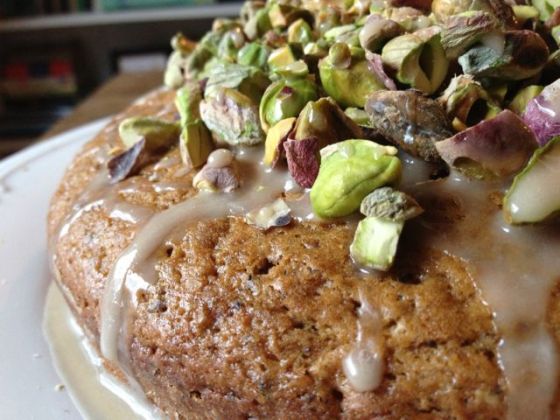
This Chai and Salted Pistachio Morning Cake comes from The Fromagette, and is an incredibly easy one bowl mini cake, perfect for  4-6 people to quickly consume.  Miss Fats threw this together for a game night when she felt the need to create an impressive dessert for an impressive crowd. Little did they know that it was just about the easiest thing ever.

IMG_2875

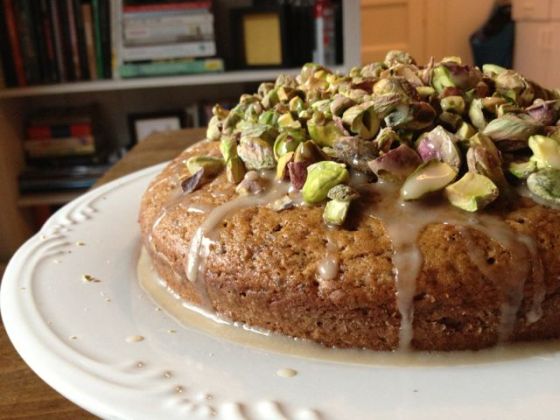
Miss Fats ended up making a couple of changes to the recipe, because it was a bit tame for her taste.  She doubled the amount of Chai to two bags, added about a tbs of cinnamon and 1/2 tbs of ground ginger.  This created an incredibly flavorful and spicy cake that would serve up perfectly with a cup of steaming coffee.  However her favorite part of this cake is, of course, the giant pile of salty pistachios mounded on top.  This creates a spicy, nutty and sweet flavor combo that would brighten any morning.

When she first came across this recipe Miss Fats was surprised by it’s categorization as a “breakfast” item.  However after testing this one out, she would actually agree.  It’s not too sweet and the texture of the cake is somewhere between a muffin and a breakfast loaf.  When she makes this cake again, Miss Fats thinks she’ll add a couple of tbs of oil to create a more muffin-like, super-moist texture.  If any of you out there give it a try, holler at Miss Fats.

IMG_2876

Miss Fats encourages all you novice bakers out there to try this recipe out.  It’s one of those incredibly easy cakes that requires almost no work, but creates a truly impressive result.  I mean look at that thing: it’s gorgeous, tasty and simple. It has brunch written all over it. You’d look like a total pro if you showed up for an event with this cake in hand.  Get out there and fool all your friends.